+ Reply to Thread
Page 1 of 3 123 LastLast
Results 1 to 20 of 60

Thread: Flaring tool problems

  1. #1
    Join Date
    Nov 2006
    Location
    SE Ohio
    Posts
    12,903
    Post Likes

    Frown Flaring tool problems

    I bought two different flaring tools in the last month and had problems with both. The first tool was the Ridgid 377
    I already own one that is at least 8 years old. I bought this one for the installers. I tried to flare 5/8" tubing but the block would not hold the tube securely. Since we were an hour from the shop I didn't want to drive to get the older one. I finally had to wrap emery cloth around the tube in the block so it would not slide. Ridgid wanted me to send it in so they could check it, but rather I returned it to the supply house instead.

    I then bought a YJ 60278. 
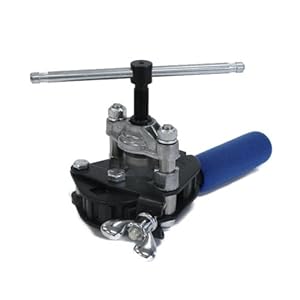
When it arrived I made a couple flares at the shop before giving it to the installers. They looked fine. Yesterday the installers were putting together a 3/8" coupling for a ductless lineset and the joint would not hold pressure. They were using Nylog on the flare and threads. They cut and flared the tubing 3 times without success. Then they got a new 3/8" coupling and new refrigeration flare nuts. Same problem. Monday we'll braze the joint.

    I buy high quality tools to avoid problems such as these.

    Has anyone else had problems with these tools?

  2. #2
    Join Date
    Aug 2004
    Location
    North Richland Hills, Texas
    Posts
    15,732
    Post Likes
    I use the YJ 60278 for flares on VRV and minisplit systems that get pressure tested at 550 psig, and it works fantastically well.

    2 key things critical to making a good flare with it, or any of the newer style eccentric or lobed cone flare tools.

    1) Deburr the copper.
    2) Don't crank down hard on the tool when it bottoms out making the flare. When you feel the tool want to stop turning, some will actually click, stop trying to turn it, and back it off.

    If you don't deburr, the burr can/will interfere with making a proper flare, either by breaking off and getting burnished into the wall of the flare, or by making the outer edge of the flare to thin.
    If you continue cranking down on the tool after it is finished flaring the tubing out, the lobes of the flaring cone mashing against the copper will leave an impression in the wall of the flare that will cause a leak.

  3. #3
    Join Date
    Mar 2007
    Location
    MA
    Posts
    190
    Post Likes
    I don't currently own either of those tools, but I believe that the Ridgid 377 is a 37-degree flare used on things like brake lines, so is that the right one? I think their 458 is the 45-degree for reefer lines.
    I do have the YJ 60295 though and have been using it for a couple of years. It seems to work well with no issues… yet. It looks almost identical to the Ridgid 458.

  4. #4
    Join Date
    Oct 2010
    Location
    Anderson, South Carolina, United States
    Posts
    21,019
    Post Likes
    Anybody tried the hilmor flaring/swaging tool or is it even available yet?

  5. #5
    Join Date
    May 2011
    Location
    Western, KY
    Posts
    3,430
    Post Likes
    Ive used four different flaring tools including the ridged pictured in the OP. I bought a Ridgid no. 458 and you would have a tough time convincing me there is a better flare tool. I've used it on the last 8 mini splits and have had zero leaks out of 50+ flare joints.

    Here's my process on prepping and performing the flare.
    Have a good tubing cutter. Clean the copper, I do for every joint whether it's braze or flare unless the copper is brand new and then I don't on flares. I don't have leaks, so I'm sticking with the plan.
    Name:  ImageUploadedByTapatalk1366469281.581227.jpg
Views: 6378
Size:  57.6 KB
    Name:  ImageUploadedByTapatalk1366469426.202511.jpg
Views: 6275
Size:  31.9 KB
    Your tubing cutter will leave an edge, I've flared some 1/4" lines without removing this without problem but if you can might as well clean it up. Just make sure it's a uniform edge with no hooks or burrs as mark said.
    Name:  ImageUploadedByTapatalk1366469457.247805.jpg
Views: 6287
Size:  24.1 KB
    Name:  ImageUploadedByTapatalk1366469563.147520.jpg
Views: 6304
Size:  34.6 KB
    Place copper into the flare tool, the exact length... I don't know but be aware and learn the "sweet spot" area for the flare.
    Name:  ImageUploadedByTapatalk1366469603.006900.jpg
Views: 6289
Size:  26.7 KB
    Name:  ImageUploadedByTapatalk1366469693.249725.jpg
Views: 6200
Size:  28.7 KB
    Use both hands to make it clamp at first, then move the flare section close to the copper and tighten the side handle until the gap closes and the handle stops.
    Name:  ImageUploadedByTapatalk1366469791.836765.jpg
Views: 6242
Size:  31.7 KB
    Name:  ImageUploadedByTapatalk1366469805.763691.jpg
Views: 6296
Size:  31.3 KB
    Now this part is IMPORTANT, this works for me every time, loosen the side handle and slowly drop the cone into the copper, by leaving it loose the cone will properly seat itself and line up, drop until snug without pushing the copper out.
    Name:  ImageUploadedByTapatalk1366469907.848162.jpg
Views: 6312
Size:  31.3 KB
    Now tighten the side handle back down. This is where I like this tool a lot for the reasons mark mentioned. As the tool tightens the handle gets pushed up along with a pin, once the flare is done it pops loose and you can't over tighten, now just move it in reverse and the pin catches again to pull the cone up.
    Name:  ImageUploadedByTapatalk1366470044.834871.jpg
Views: 6114
Size:  29.9 KB

    Continued in next post for picture limit.

  6. #6
    Join Date
    May 2011
    Location
    Western, KY
    Posts
    3,430
    Post Likes
    Name:  ImageUploadedByTapatalk1366470090.785899.jpg
Views: 6422
Size:  27.9 KB
    Name:  ImageUploadedByTapatalk1366470105.261176.jpg
Views: 6105
Size:  26.0 KB
    Now look at your flare. It should not be too bunched on the outside edge from too much copper nor too small. I like it a little shy from the edge, could've gotten a hair more on this one but this flare will seat properly and be leak free.
    Name:  ImageUploadedByTapatalk1366470176.679456.jpg
Views: 6489
Size:  31.9 KB
    Doesn't hurt to check smoothness of the wall.
    Name:  ImageUploadedByTapatalk1366470253.885219.jpg
Views: 6161
Size:  59.8 KB

    Make sure you lubricate the back of the flare, the mating surface and the threads. Do not over tighten and mess up/split your flare, when in doubt get a really good hand tight, use your strong hand, then turn with a wrench with back up, 1/2 turn on the smaller stuff and 1/2-3/4 on the the bigger stuff, that's it don't man handle the thing it's not gas pipe.

  7. #7
    Join Date
    Aug 2004
    Location
    North Richland Hills, Texas
    Posts
    15,732
    Post Likes

  8. #8
    Join Date
    May 2011
    Location
    Western, KY
    Posts
    3,430
    Post Likes
    Quote Originally Posted by mark beiser View Post
    @mason

    What, no flare gauge?
    H*ll no, it's wild west style out here!!!

    Honestly, I've never even seen one, gah!

  9. #9
    Join Date
    Dec 2004
    Location
    Grand Rapids, MI
    Posts
    670
    Post Likes
    Our guys use the factory flare on the line set and just cut & braze a foot up from the flare.
    luck dan

  10. #10
    Join Date
    May 2011
    Location
    Western, KY
    Posts
    3,430
    Post Likes
    Quote Originally Posted by danielworkerbee View Post
    Our guys use the factory flare on the line set and just cut & braze a foot up from the flare.
    luck dan
    Why are they cutting and brazing a foot from the flare? I'm not sure I understand the process that results in that step being used.

  11. #11
    Join Date
    Jan 2010
    Location
    Sea to Sky
    Posts
    7,033
    Post Likes
    You forgot to put your flare nut on first.

    Sent from my SGH-I747M using Tapatalk 2

  12. #12
    Join Date
    Sep 2008
    Location
    Western PA
    Posts
    26,690
    Post Likes
    Quote Originally Posted by mason View Post

    Why are they cutting and brazing a foot from the flare? I'm not sure I understand the process that results in that step being used.
    To shorten the line set if I'm understanding properly.


  13. #13
    Join Date
    May 2011
    Location
    Western, KY
    Posts
    3,430
    Post Likes
    Quote Originally Posted by BALloyd View Post
    You forgot to put your flare nut on first.

    Sent from my SGH-I747M using Tapatalk 2
    Yes don't forgot that : ). It is a real bummer when you do that and have to start all over!

  14. #14
    Join Date
    May 2011
    Location
    Western, KY
    Posts
    3,430
    Post Likes
    Quote Originally Posted by jpsmith1cm View Post
    To shorten the line set if I'm understanding properly.
    Sounds inefficient but I guess everybody has their way.

    Usually the only joints I have are at the units and I don't get the torches out at all. Did have a church recently where the lines ran over 50' so we had two braze connections on the rough in, I leave enough sticking out that I can cut, flare and connect with no more brazing. Also, if the joint is accessible you can always use a flare coupling for longer lines when splicing.

    I've seen some rough factory flares, so I typically cut them off and do my own.

  15. #15
    Join Date
    May 2009
    Location
    South of Heaven
    Posts
    1,407
    Post Likes
    I've had problems with the YJ tool on 1/4 inch od tubing. It is difficult to get to clamp tight enough and the flaring action pushes the pipe from the dies. Other than that it seems to do fine.

  16. #16
    Join Date
    Jul 2007
    Location
    Delaware
    Posts
    3,825
    Post Likes
    Tighten the side closest to the copper first.

  17. #17
    Join Date
    Aug 2004
    Location
    North Richland Hills, Texas
    Posts
    15,732
    Post Likes
    Quote Originally Posted by danielworkerbee View Post
    Our guys use the factory flare on the line set and just cut & braze a foot up from the flare.
    luck dan
    On all of the factory made line sets I've seen, the factory flares are garbage compared to the nice crisp burnished flares my YJ flaring tool makes.
    Usually they are bad enough that they would fail if I checked them with my Daikin flare gauge.

  18. #18
    Join Date
    May 2011
    Location
    Western, KY
    Posts
    3,430
    Post Likes
    Quote Originally Posted by mark beiser View Post
    On all of the factory made line sets I've seen, the factory flares are garbage compared to the nice crisp burnished flares my YJ flaring tool makes.
    Usually they are bad enough that they would fail if I checked them with my Daikin flare gauge.
    You have any links to this flare gauge and it's implementation?

  19. #19
    Join Date
    Nov 2012
    Location
    Canada
    Posts
    85
    Post Likes
    Ive had the YellowJacket deluxe for a couple years and I have had great results with it. I don't flare a whole lot but I cant lose a part if its all one piece! And you don't have to guess the protrusion.

  20. #20
    Join Date
    Apr 2013
    Location
    Knoxville TN
    Posts
    53
    Post Likes
    I was taught years ago by a old tech to use a nickle (thickness) to measure the pipe in the clamp. I hope im explaining it right, but i always do it and never had any problems. I can take pics if needed. I guess that would be consider a flare gauge. I have told this to other techs in the field and they never heard anyone do that but they all agreed its a good idea.

+ Reply to Thread
Page 1 of 3 123 LastLast

Quick Reply Quick Reply

Register Now

Please enter the name by which you would like to log-in and be known on this site.

Please enter a password for your user account. Note that passwords are case-sensitive.

Please enter a valid email address for yourself.

Log-in

Posting Permissions

  • You may post new threads
  • You may post replies
  • You may not post attachments
  • You may not edit your posts
  •