+ Reply to Thread
Results 1 to 17 of 17

Thread: Liebert 15 ton Compressor Changeout

  1. #1
    Join Date
    Apr 2012
    Location
    Paper Street Soap Company
    Posts
    2,312
    Post Likes

    Liebert 15 ton Compressor Changeout

    Told Boilerman I was going to do another photo documentary but on a Calyse 06D I did this morning.

    Downtown Houston from 33 floors up ! The building Chief wouldn't let us do any brazing during the week so it was a nice Saturday job.


    Old 7.5 HP Compressor with mechanical damage but still pumped well enough to close the suction King Valve and isolate the refrigerant in the heat exhanger ( water cooled unit )

    The pot head drops out of the way and the unloader solenoid is tucked out of the way. Time to build the A-Frame/ Chain fall assembly.


    Here's the chain-fall rig. Nice and safe way to pull a 06D out of a Liebert. The A-Frame is supports one side of the I-Beam and the unit supports the other side of the I-Beam. I put a level on it and shim it up on the unit side.

    If it's not level the chainfall will slide around.


    Old next to new and ready to swap a few things out. Have to button up the old one or Carrier won't take it back as a core. Notice the new Compressor ( right ) didn't come with a suction cut-off unloader head ?


    So I had to reuse the old unloader head and a new unloader gasket that Carrier was kind enough to include with the Compressor.

    For those not familiar with pulling valve plates and swapping heads on Carlyse Compressors be careful when swapping heads to use the correct valve plate gasket and not to ump the suction valves and keepers off their pins when reassembling.


    Anyway on to getting ole' bessie out and installing the new compressor with the old unloader head......


    continued...

  2. #2
    Join Date
    Apr 2012
    Location
    Paper Street Soap Company
    Posts
    2,312
    Post Likes
    Thread Starter
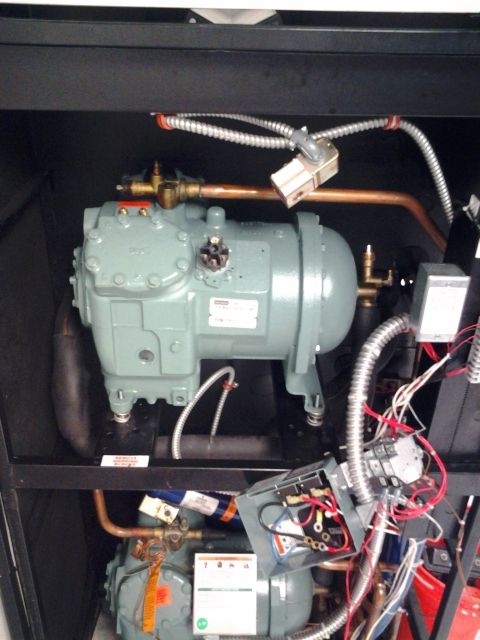
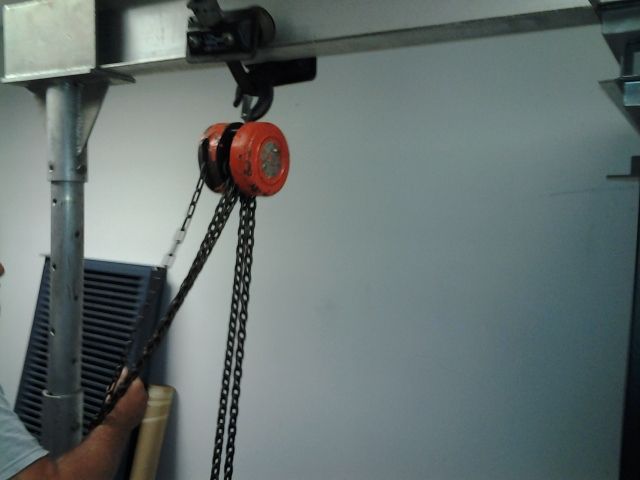
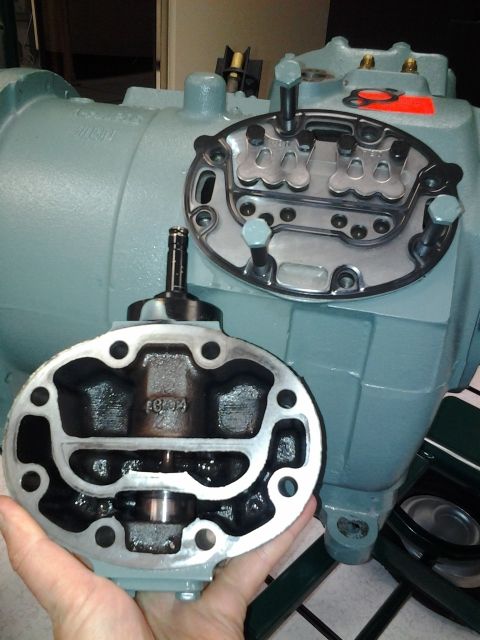
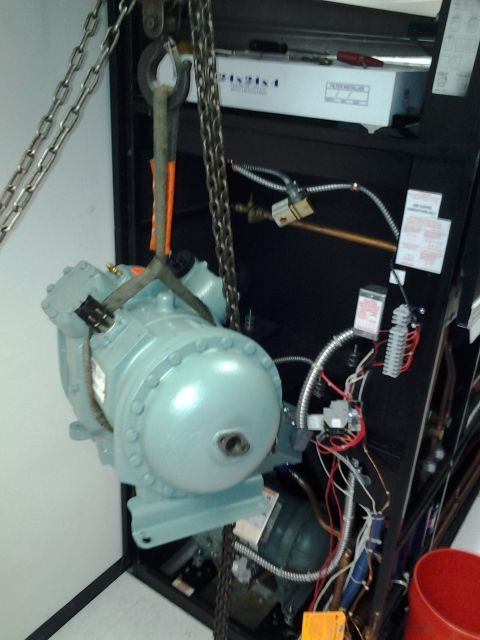
    New comp installed with new flange gaskets "slightly oiled". Just basically swing it in and catch the stud on the right closest to you first. Slowly lower with chain fall until it's sitting on the springs,


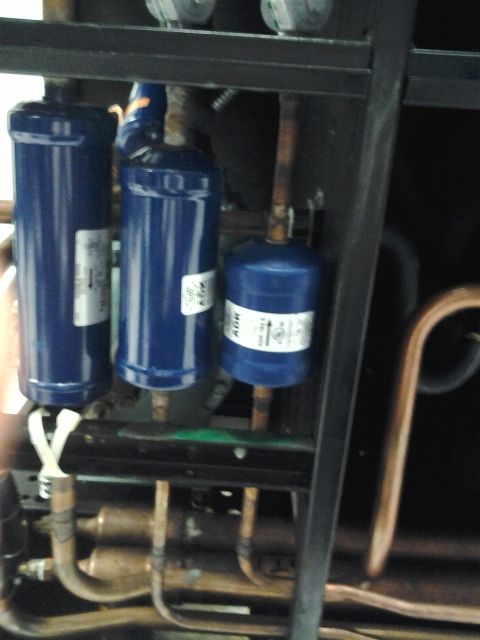
    Old drier needs to come out. It's compulsory in my book on any compressor change-out. So after leak checking just the isolated semi-hermetic with nitro, pulled vacuum a break with R22 gas, open king valves and close liquid ball valve on water cooled condenser. Torque all the electrical lugs down with new hardware ( it's included with the compressor )


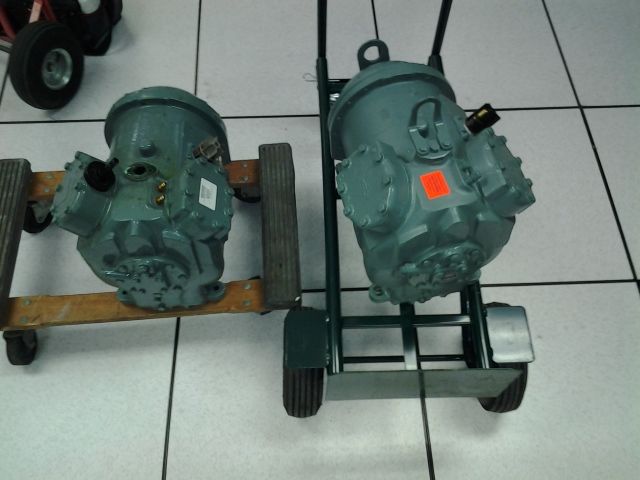
    After pumping down new compressor shut suction king valve and pull old drier....( It was restricted, go figure ) and replace with 30 cu'' Carrier drier. Oh and replaced the panduits with a clap on the number 1 compressor discharge line.


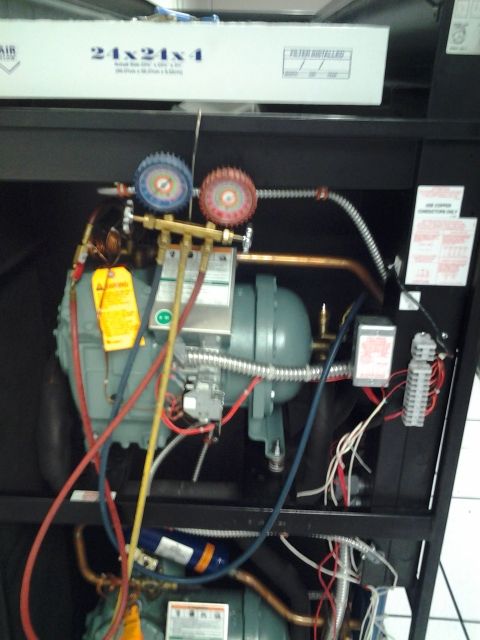
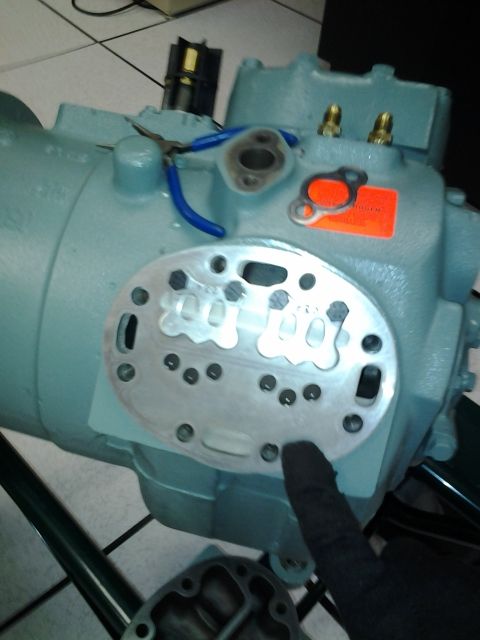
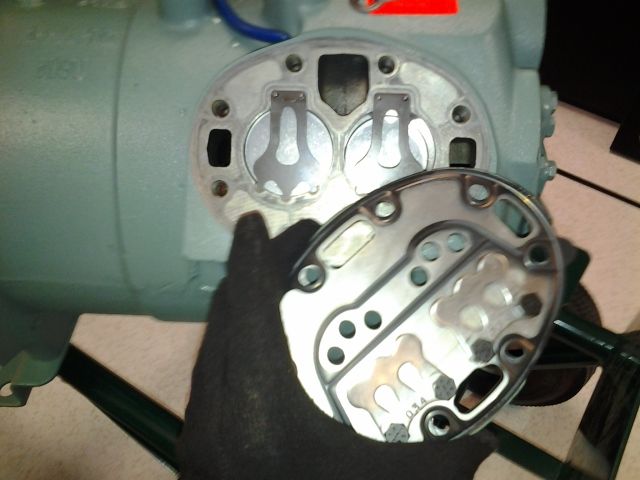
    Yea I know it throws the color scheme off. Oh well function over form. Any way start up the comp watching superheat and amps and force load and unload to make sure my old used unloader is working.

    Super heat = 12 degrees compressor pulling 12.5 amps loaded ( RLA is 14 ) with 15 sub cooling and a clear sight glass. Time to pick up.


    Oldest son back from the Navy last week to marry his girlfriend. He's taking a pic with my oldest daughter.


    A funny pic and more evidence that points to the fact that I was born too late.


    Anyway there you go. Easy Saturday. I've got several data centers filled with these things so I can change these out half asleep.

  3. #3
    Join Date
    Sep 2007
    Location
    State College, PA
    Posts
    5,579
    Post Likes

    Thanks 6

    Nice little step by step.

    Glad you had an easy day.

    Looks like you did a nice job. Glad the old unloader was still working.
    Can someone please explain to me -
    Why is there never enough time to do it right the first time, but plenty of time to do it twice?


    Please view site rules: http://hvac-talk.com/vbb/showthread.php?t=1241

    Apply for Pro Membership: http://hvac-talk.com/vbb/showthread.php?t=116113

  4. #4
    Join Date
    Jul 2012
    Location
    San Francisco Bay area
    Posts
    90
    Post Likes
    Just installed 7 liebert CRAC units with the new scroll compressor setup.

  5. #5
    Join Date
    Jul 2012
    Location
    Southwest
    Posts
    114
    Post Likes
    I just did valve plate kits on one of those. Note: They do stock them at Sigler on the shelves, even when you call them and they have no clue what they area.
    My Liebert guy only keeps 3 in stock, which can be sold any second.
    That back plate is near impossible to change, even after sliding the compressor out.
    Looking at your pics, I will cut some extra bolts/minus the head to hold the gaskets in place when i put the cover back on.

  6. #6
    Join Date
    Mar 2012
    Posts
    5
    Post Likes
    Do u have more pics of your A frame rigging setup? Nice job BTW

  7. #7
    Join Date
    Jan 2010
    Posts
    45,370
    Post Likes
    How do you get jobs that clean ? I could do that one in dress cloths.
    Keep up the good work.

  8. #8
    Join Date
    Apr 2012
    Location
    Paper Street Soap Company
    Posts
    2,312
    Post Likes
    Thread Starter
    Quote Originally Posted by VTP99 View Post
    How do you get jobs that clean ? I could do that one in dress cloths.
    Keep up the good work.
    Server rooms filled with Lieberts and Data Aires are the ticket !

    We have to keep the job clean or they get irritated.

    Not only was it clean they shut down their servers and left the othe 20 ton unit running.

    Freezing.

  9. #9
    Join Date
    Apr 2012
    Location
    Paper Street Soap Company
    Posts
    2,312
    Post Likes
    Thread Starter
    Quote Originally Posted by B1978 View Post
    I just did valve plate kits on one of those. Note: They do stock them at Sigler on the shelves, even when you call them and they have no clue what they area.
    My Liebert guy only keeps 3 in stock, which can be sold any second.
    That back plate is near impossible to change, even after sliding the compressor out.
    Looking at your pics, I will cut some extra bolts/minus the head to hold the gaskets in place when i put the cover back on.
    Would have tried valve plates but the damage wasn't on top.

    I had to swap heads and changed head gaskets for the unloader.

    I had some studs a while back but no telling where they are. I just take my time and try to be as patient as I can when replacing valve plates.

  10. #10
    Join Date
    Jan 2010
    Location
    Central Texas
    Posts
    259
    Post Likes
    I prefer to use a Lift Table to get the compressor in/out. Picked one up at Harbor Freight for a coulple hundred bucks. I use it to remove the New Comp out of my truck, then wheel it into the Data Center. Then raise up the new Comp next to the old Comp. Sliding the old Comp onto the lift table, then slide the new Comp into place. Lowering the old Comp down. Table is rated high enough to lift both and I can get it all done in 4-6 hours by myself. Just depends on if it is a burnout, as they need extra time for proper cleanout. Been doing it this way since I worked for Liebert.

  11. #11
    Join Date
    Sep 2002
    Posts
    17,037
    Post Likes
    Quote Originally Posted by sgraefe View Post
    I prefer to use a Lift Table to get the compressor in/out. Picked one up at Harbor Freight for a coulple hundred bucks. I use it to remove the New Comp out of my truck, then wheel it into the Data Center. Then raise up the new Comp next to the old Comp. Sliding the old Comp onto the lift table, then slide the new Comp into place. Lowering the old Comp down. Table is rated high enough to lift both and I can get it all done in 4-6 hours by myself. Just depends on if it is a burnout, as they need extra time for proper cleanout. Been doing it this way since I worked for Liebert.
    yep, thats the way I do them too!Done them by myself!

  12. #12
    Join Date
    Apr 2012
    Location
    Paper Street Soap Company
    Posts
    2,312
    Post Likes
    Thread Starter

    Frown

    Quote Originally Posted by sgraefe View Post
    I prefer to use a Lift Table to get the compressor in/out. Picked one up at Harbor Freight for a coulple hundred bucks. I use it to remove the New Comp out of my truck, then wheel it into the Data Center. Then raise up the new Comp next to the old Comp. Sliding the old Comp onto the lift table, then slide the new Comp into place. Lowering the old Comp down. Table is rated high enough to lift both and I can get it all done in 4-6 hours by myself. Just depends on if it is a burnout, as they need extra time for proper cleanout. Been doing it this way since I worked for Liebert.
    Yea I've seen them but we use the A-Frame for other things and my boss isn't going to spring for one.

    It's one A-Frame support with a 6 foot I-beam ( both alluminum ) and a 5 gallon Home Depot bucket filled with the straps and a chainfall.

    I've been doing it that way for years so its hard to convince him there's better way.

    About 5 years ago one of our Data Centers that has all of their condensers located on top of a metal plated deck though it was a good idea to fill up the 15 foot chainlink fence with plastic slats.

    On top of that the IT guys added hardware without communicating with facillities.

    Got a service call one july afternoon that it was hot in the server room and by the time I got there they had lost 5 compressors out of 20 thirty ton units.

    By the time the ordeal was over we replaced a total of 13 which forever turned me against Carlyse semi hermetics.

    I have another data center with Data Aires with Scrolls that have had similar issues without massive amounts of compressor failures.

  13. #13
    Join Date
    Jan 2010
    Location
    Central Texas
    Posts
    259
    Post Likes
    I just don't like the idea of having to haul in the A-frame, I-beam, and bucket with the straps and chainfall. You still need to wheel in the Comp on a furniture dolly or flat cart. So why not just wheel it in on the lift cart? It also makes getting the Comp in/out of your truck/van easier.

    I've used the A-frame setup before, when I worked for a Comm Srv Co, but didn't like the constant shuffle to get the job done. Set the A-frame up to unload the new Comp from the Van, then haul everything to the unit, then set up the A-frame again, then remove/replace the Comp in the unit, then haul everything back to the truck, then setup the A-frame again to get the old Comp back into the van. Made for a longer day in my opinion.

  14. #14
    Join Date
    Apr 2012
    Location
    Paper Street Soap Company
    Posts
    2,312
    Post Likes
    Thread Starter
    Do you remove the studs and springs to slide in the new comp ?

  15. #15
    Join Date
    Jan 2010
    Location
    Central Texas
    Posts
    259
    Post Likes
    Yes, I pull the springs and studs to get the old one out, and the new one in. It adds a little time, but I think it makes the changeout go smoother. It also gives me a chance to look at the studs and springs. You would be suprised at how many times I find one or both broken. That's why I keep a spare spring kit on the truck.

  16. #16
    Join Date
    Jan 2010
    Location
    Central Texas
    Posts
    259
    Post Likes
    I really like the DS model units. They have a solid plate that the Comp is mounted on. No fears of the Comp sliding off the rails.

  17. #17
    Join Date
    Apr 2012
    Location
    Paper Street Soap Company
    Posts
    2,312
    Post Likes
    Thread Starter
    Thats the new black cabinet units where you access the comp from the front of the unit ?
    I hate tge user interface on those units. It seems so slow and clumsy.
    I carry a Carlyse spring kit too.

+ Reply to Thread

Quick Reply Quick Reply

Register Now

Please enter the name by which you would like to log-in and be known on this site.

Please enter a password for your user account. Note that passwords are case-sensitive.

Please enter a valid email address for yourself.

Log-in

Posting Permissions

  • You may post new threads
  • You may post replies
  • You may not post attachments
  • You may not edit your posts
  •